 AutoSplitter
Scan multiple photos at once and crop them automatically
Scan multiple photos at once with AutoSplitter photo scanning software
 Made for Windows 11 & 10
 Click here to see a short demonstration video >>
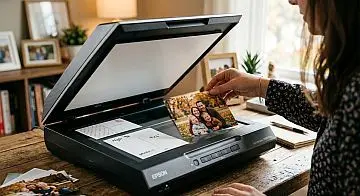
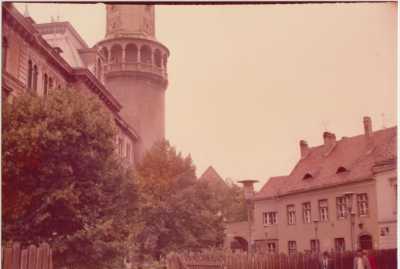
AutoSplitter is photo scanning software. This Windows utility allows you to scan multiple photos at once, improving scanning efficiency. Individual photos are automatically detected, cropped, straightened, and saved as separate image files.
Unique feature: Batch-process your pre-scanned photos. If you've already scanned photos individually or in batches and need to crop them, AutoSplitter can process all the files at once and crop them automatically.
Auto detect and crop scanned photos to individual files.
Restore vivid colors and add contrast to your old family photos.
Add text captions to your scanned photos. Save captions and dates into exif metadata.
How to scan multiple photos at once
Follow these simple instructions to quickly scan your family photo collection with this photo scanning software. The default workflow of this utility will let you scan multiple photos at once and crop them automatically. Scan multiple pictures and separate them easily. Extract images from the scan like magic.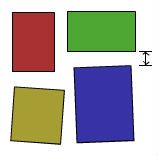
 Download and install AutoSplitter picture scanning software.
- Place several photos on your flatbed scanner. Make sure they don't overlap and leave at least half inch gap between them. 3-5 photos will fit comfortably.
- Click Scan in AutoSplitter - choose scanner and DPI (scanning resolution) on the first scan. You can change this later.
- AutoSplitter will auto detect, straighten and highlight separate photos in your scan - adjust the detected areas at this point with your mouse if you need to. Detected photos are called "splits".
- Click Save All - scanned photos will be auto cropped and saved to individual files.
- Repeat from step #2 for subsequent photos.
Auto cropping pre-scanned files
 DOWNLOAD
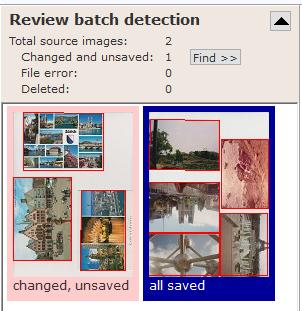 Many people scan multiple photos at once and save the results to files without splitting the scan into individual images. AutoSplitter photo scanning software can
help you in this scenario as well. You can open any amount of pre-scanned files and the software will detect and auto crop individual photos
from each scanned image and will save them to separate files. There are 3 ways to initiate file processing:
Many people scan multiple photos at once and save the results to files without splitting the scan into individual images. AutoSplitter photo scanning software can
help you in this scenario as well. You can open any amount of pre-scanned files and the software will detect and auto crop individual photos
from each scanned image and will save them to separate files. There are 3 ways to initiate file processing:
- Click Open File(s) button in AutoSplitter and choose the file(s) you want to be auto cropped.
- Click Open Folder button in AutoSplitter and choose the folder that contains your pre-scanned images.
- Drag and drop one or more scanned image files from Windows Explorer onto AutoSplitter's main screen.
- Double click an image in this panel. The image will be opened and the splits will be displayed in the right hand panel.
- Make adjustments to the detected photos if needed.
- Save all button writes all photos to disc.
- Repeat from step #1 as long as you have reviewed everything.
You can scan trading cards, baseball cards, postcards as well. The software will recognize rectangular shapes and auto crop them.
Retouch your scanned photos automatically


 DOWNLOAD
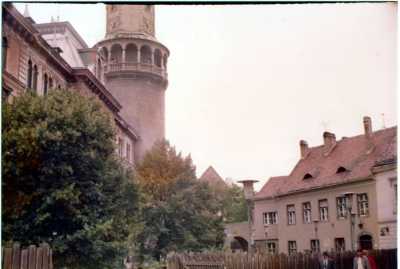
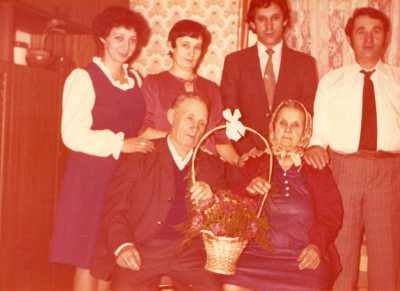
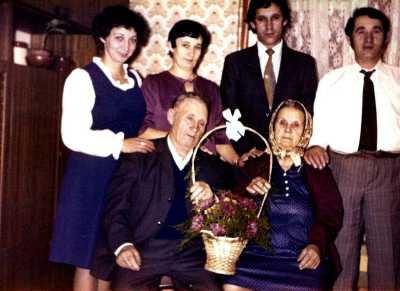
Old photos usually fade or yellow. Why does this happen? It's mainly down to 3 things: 1) UV radiation. Ultraviolet frequencies are a part of natural sunlight. These rays are damaging, they will cause your photos to fade out over time. Protect your old prints from light, keep them under cover all the time! 2) Acidic paper. Some photos have been printed on material that will deteriorate without any interference over time. This usually causes orangeish tint in your photo. 3) Fungal growth. You can't avoid these tiny lifeforms - they will cause brownish discoloration to your photos. Most fungi like damp and dark places, so keeping your photos as dry as possible helps prevent fungal build up.
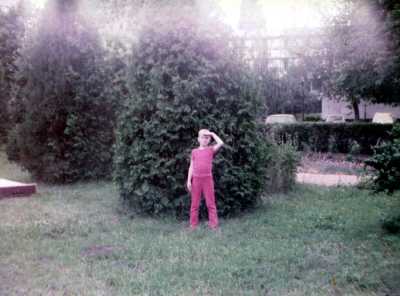
Whatever happened to your colors, AutoSplitter offers automatic photo correction features which efficiently fights against all these aging effects. Revitalize colors feature will bring your old, faded or yellowed photos back to life. Even black and white photos are going to be much more vivid after revitalization. You can also change contrast and saturation values of your scanned photos. Increased contrast will make photos more lively, while increased saturation will make colors pop out even more. Experiment with the automatic color correction options: different photos need different treatment. Remember to revise your settings periodically, something that worked with your previous batch of photos might not be as ideal for the next batch.
Feel free to check out these image recovery before & after samples in this section: see how AutoSplitter restored colors of deteriorated photos.
Starting from v1.13 this photo scanning software lets you can adjust scanner brightness and contrast to further improve quality of your scans. It is recommended to slightly increase contrast and decrease brightness for crispier images.
Add text captions and meta tags to your scanned photos
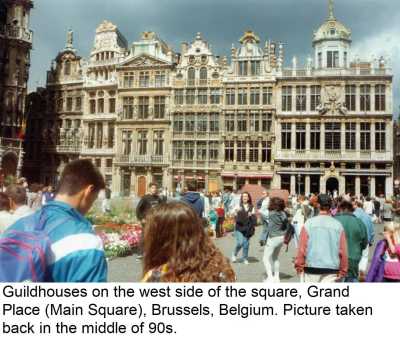
Yet another feature of this photo scanning software is captioning and meta tagging. Responding to popular request you can now add text captions under your scanned photos. Caption font, color and background color can be changed to suit your taste.
Scan multiple photos at once, then caption them just before saving to disc. Text captions are a useful tool to preserve and relive even more memories. You can add dates, locations and names of friends and relatives who have been captured in the photo.
See example captioned photo to the left.
DOWNLOADMeta tags are useful information embedded inside the image file itself. These tags are invisible on the photo, but many image
editing and cataloging software can display and use these tags to make the image easier to find. You can save your captions as visible
captions (see above) or metadata information or BOTH.
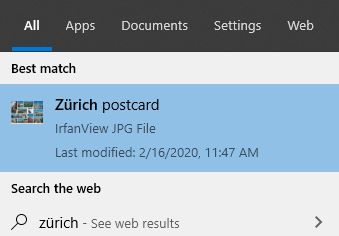 Windows will index metadata information of your scanned photos and will help you find the images. This is what I get when I type Zürich
into the Windows search bar - see screenshot on the left.
Windows will index metadata information of your scanned photos and will help you find the images. This is what I get when I type Zürich
into the Windows search bar - see screenshot on the left.
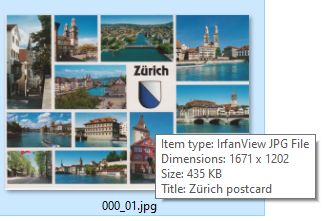
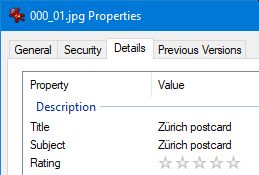
Furthermore, Windows Explorer will display these captions saved into the file when hovering over them with the mouse or when observing the file
properties, or selecting an image file with the View/Details pane enabled. For JPEG and TIF files annotations are saved as exif metadata.
EXIF support is widespread accross all image software. Metadata is also saved for PNG files, but it's a different format (IDAT chunks), with limited 3rd party support.
Windows Explorer will only display metadata of JPG and TIF files. Other image software may or may not
support these tags. Please verify your options if you are planning to use this great feature.
Other useful features
DOWNLOAD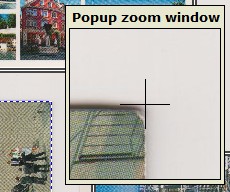
There are several useful features to help you scanning all your old family photos.
- Save images in 2 different formats at once. For example JPEG and TIF.
- Manual adjustments allowed to finetune automatic photo detection.
- Popup zoom at your mouse pointer to let you finetune photo splitting more accurately.
- One click to rotate scanned photos by 90, 180 or 270 degrees to restore original photo alignment.
- One click to flip photos vertically or horizontally.
- Zoom In to let you observe the scanned image in 100% size - every pixel counts.
- Full page scan feature to let you scan letters, documents or very large photos easily.
4 corners scanning method for fastest and best results
DOWNLOAD- Put one photo in each corner of your flatbed scanner's document window.
- Make sure the checkbox "preserve splits" is checked in AutoSplitter.
- Click the Scan button and see your photos being autodetected and cropped. If you need to, adjust the cropping areas.
- Click Save All to write the individual photographs to disc.
- Repeat from step #1 - from now on AutoSplitter will reuse the highlighted areas for cropping and extracting the freshly scanned photos.
Technical specifications
DOWNLOADAutoSplitter multiple photo scanning software is Windows compatible. The software should work with all flatbed scanners through WIA and/or TWAIN interface. Please update your scanner's driver software package if you experience compatibility issues. Open files of TIFF, JPEG, GIF, PNG or BMP. Save all of these except BMP. DPI information will be preserved when loading/scanning images in all cases when the output format supports EXIF metadata. This comes handy in case you would ever want to reproduce your scans in print. Captions saved to EXIF metadata for JPEG and TIF, into IDAT chunks for PNG.
Download AutoSplitter now!Website and software copyright by Zoltan Peter, European Union 2013-2026
Website hosted in Mesa, USA.
Privacy statement
Website localization: English for global coverage (en), hosted by opalstack